
Now that my craft room is organized and my desk (and the floor space around it) is (mostly) clear, I feel so much more creative! It also helps that I have time to play again instead of just cleaning...
Anyway, in the midst of organizing last week, I had a small stack of papers that I just had to use up immediately. So I made a quick collage in my Art of Spring journal. Now, the workshop is over, but I haven't tackled even close to half the projects! This is the next one. The design is completely inspired by Junelle Jacobsen (the instructor) but the background is inspired more by Christy Tomlinson's process. Junelle usually paints a simple background and adds texture after - Christy "finishes" her background first. I prefer the latter approach; personally, it just makes sense to me.
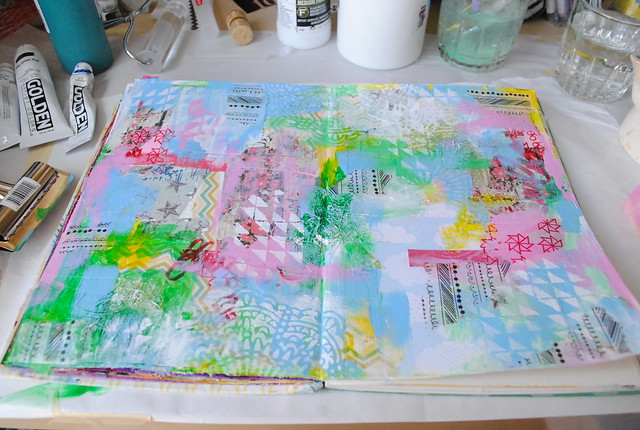
So here's the first layer of collage (using scrapbooking, tissue and handmade papers):


 I'm so proud of myself - I've been holding onto those clouds for such a long time! I'm glad I finally put it to use!
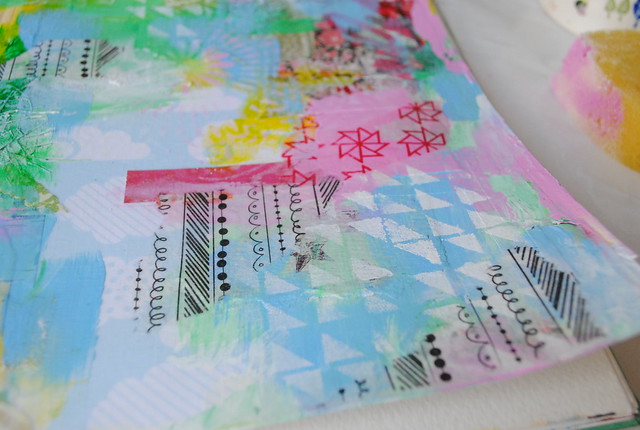
At some point during the end of last week and weekend, I added a bit of doodling using white Sharpies and a crimson red Prismacolor pen and added some washi and masking tape here and there. Then, on Sunday after my family left, I sat down and really got creative.
First, I painted with my fingers and brushes (permanent green light, hansa yellow medium, ultramarine blue, smalt hue, quinacridone magenta, gesso). Then I broke out my new stencils and sponged away, mostly with gesso but also with a bit of the pink. Lastly, I collaged in a few pieces of Christy Tomlinson's doodled coffee filters and that red-printed pink tissue paper to bring it all together.

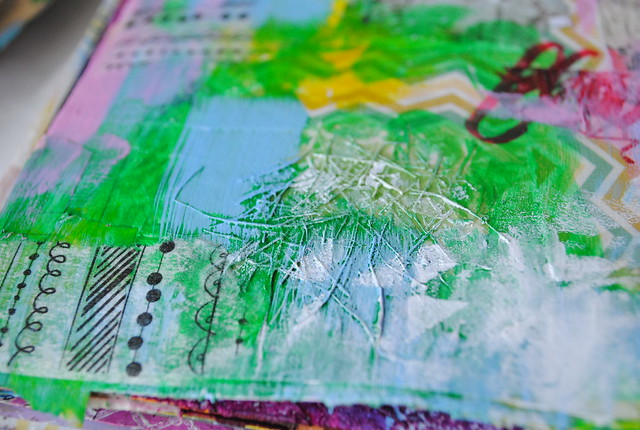
 I absolutely LOVE those stencils! They add great texture and were so much fun to use. I'm glad I added a few cheap spray bottles in my latest supplies purchase (shipped today!) to use with these, though the sponge gave a really great effect too.
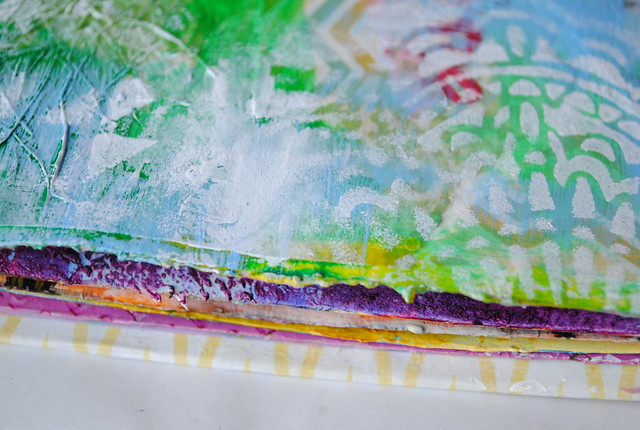
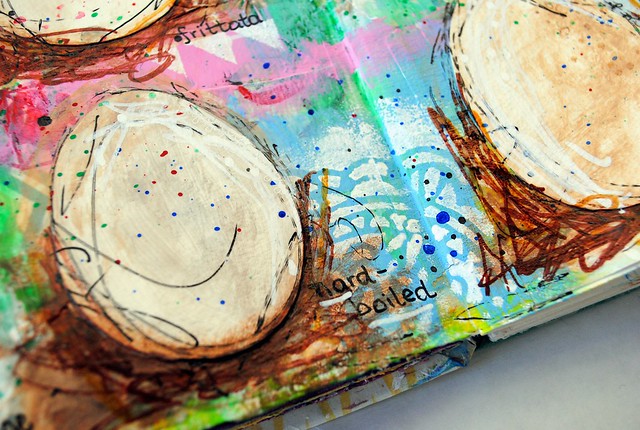
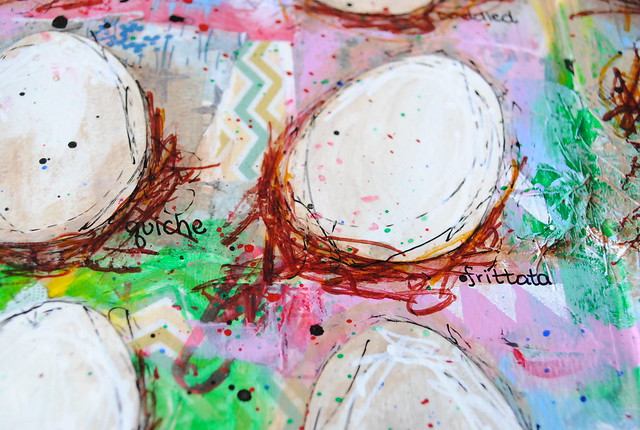
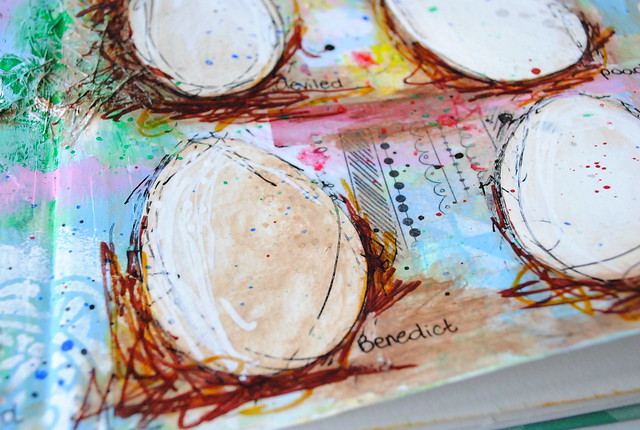
Can I just stop to admire those bits of green handmade paper? They took up the paint so nicely and look a bit like hay or nests... perfect for eggs!
The fun, spring background was also perfect for eggs - their natural tints would pop off all that texture wonderfully. I cut the eggs out of watercolour paper to give them a bit of added dimension and really separate them from the background. Next I painted them and their shadows (gesso, titan buff, burnt umber light) and added a bit of "grunge" to the background with the tan paint. Then, all they needed to finish up was a bit of doodling (black Scarlet Lime doodling pen, Sharpies in white, brown, black, green), rub-ons (Christy Tomlinson borders in white) and splatter (watered down paint / ink: permanent green, ultramarine blue, naphthol red light, black India ink).


 I am so in love with this page! It turned out exactly as I hoped - no, scratch that, it's even better. The texture and colours are delicious. It just makes me smile every time I look at it!
I'm also starting to really develop my own process of making a piece. I'm taking tips from different artists I love and using them to work out my own style. SO much fun!
More creative spaces here.
Anyway, in the midst of organizing last week, I had a small stack of papers that I just had to use up immediately. So I made a quick collage in my Art of Spring journal. Now, the workshop is over, but I haven't tackled even close to half the projects! This is the next one. The design is completely inspired by Junelle Jacobsen (the instructor) but the background is inspired more by Christy Tomlinson's process. Junelle usually paints a simple background and adds texture after - Christy "finishes" her background first. I prefer the latter approach; personally, it just makes sense to me.
So here's the first layer of collage (using scrapbooking, tissue and handmade papers):
At some point during the end of last week and weekend, I added a bit of doodling using white Sharpies and a crimson red Prismacolor pen and added some washi and masking tape here and there. Then, on Sunday after my family left, I sat down and really got creative.
First, I painted with my fingers and brushes (permanent green light, hansa yellow medium, ultramarine blue, smalt hue, quinacridone magenta, gesso). Then I broke out my new stencils and sponged away, mostly with gesso but also with a bit of the pink. Lastly, I collaged in a few pieces of Christy Tomlinson's doodled coffee filters and that red-printed pink tissue paper to bring it all together.
Can I just stop to admire those bits of green handmade paper? They took up the paint so nicely and look a bit like hay or nests... perfect for eggs!
The fun, spring background was also perfect for eggs - their natural tints would pop off all that texture wonderfully. I cut the eggs out of watercolour paper to give them a bit of added dimension and really separate them from the background. Next I painted them and their shadows (gesso, titan buff, burnt umber light) and added a bit of "grunge" to the background with the tan paint. Then, all they needed to finish up was a bit of doodling (black Scarlet Lime doodling pen, Sharpies in white, brown, black, green), rub-ons (Christy Tomlinson borders in white) and splatter (watered down paint / ink: permanent green, ultramarine blue, naphthol red light, black India ink).
I'm also starting to really develop my own process of making a piece. I'm taking tips from different artists I love and using them to work out my own style. SO much fun!
More creative spaces here.
4 comments:
I love what you did with the lesson!! Great work.
I was going to skip this lesson in junelles teaching, but you inspire me to try it :)
I really like the way your background steps forward visually here, with the eggs forming a repeated pattern looks like you had a lovely time!
This is cool. I love visitting your blog, there's so much passion and color :)
Post a Comment