
Even though I'll soon be packing up my fall decor, I wanted to make a few quick and easy fall / Halloween banners to make the place a little festive for my favourite season. Since I start work this week, I thought this would be the perfect time to schedule a few simple tutorials for the banners I made!
This first one was very simple and came together in no time.
Materials:
coloured and/or patterned cardstock paper
twine, ribbon or some other string
scissors
glue stick
graph paper
pencil
ruler
Methods:
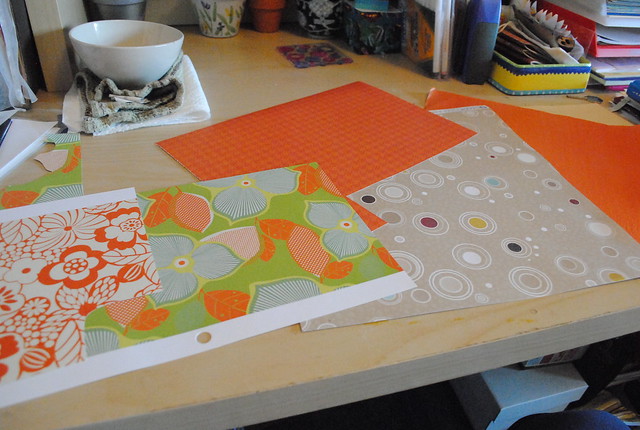
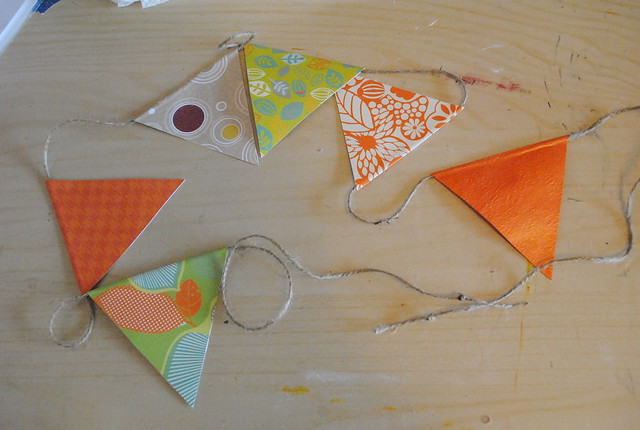
1. Choose your paper. I wanted to make a short banner, so I chose 6 different patterned / textured papers (I added a green one to this bunch).
2. Make a template. I used graph paper to make it easy. And it really is easy... just not so easy to explain. Let me try...
Using the ruler and pencil, I drew a diagonal that would make a triangle in the size I wanted for my flags (starting and ending at an intersection on the graph paper). Next, I made the triangle shape by counting the graph squares to the (soon-to-be) center of the (soon-to-be) diamond shape, then counting out that same number to determine the width of the diamond (this line completes the triangle now drawn). Once the second diagonal was drawn, I repeated the same steps along the vertical center line and filled in the final two diagonals. In other words, you should be able to connect the points of the diamond to create a cross that has arms of equal length and a top and bottom of equal length (typically a little bigger than the arms).

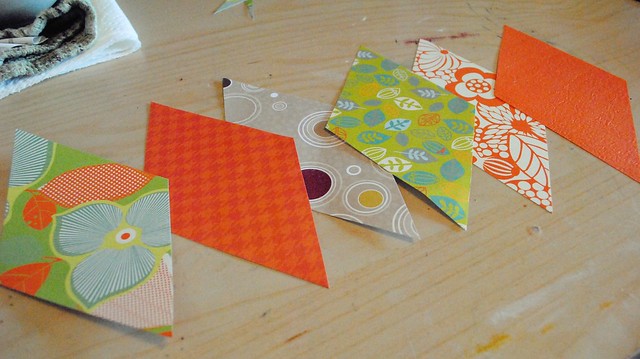
3. Cut out your template, then use it to trace a diamond on each of your papers. Cut them out (and erase any pencil marks if necessary).
4. Fold each diamond shape in half lengthwise to create your flags. Decide what side you want as the "front" and in what order you want them.
5. Cut out your twine. I estimated the length by placing my my flags on my desk, separated approximately by the distance I wanted them to be apart, and then just measured out the twine to accommodate this with extra for the ends. I then marked where I wanted to flags to go so that they would be centered (you could easily trim your twine at the end to skip this step).
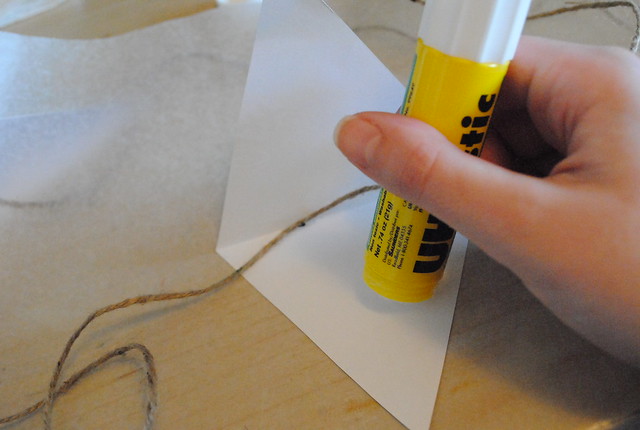
6. Glue your triangles together (sandwich-style), capturing the twine along the fold.

7. Continue until all your flags are glued to the twine.
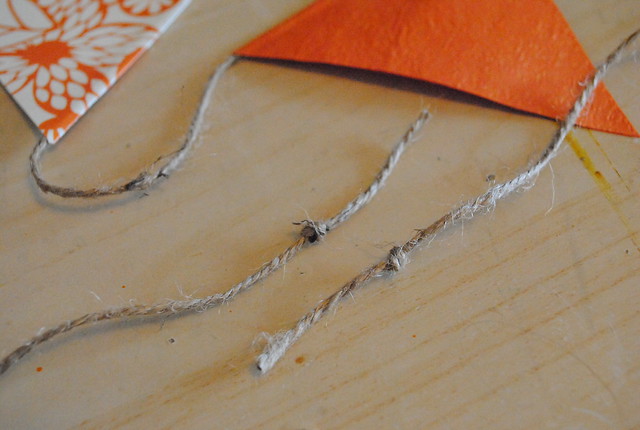
8. Trim the flag edges if necessary. I then finished the ends of the twine with a knot.
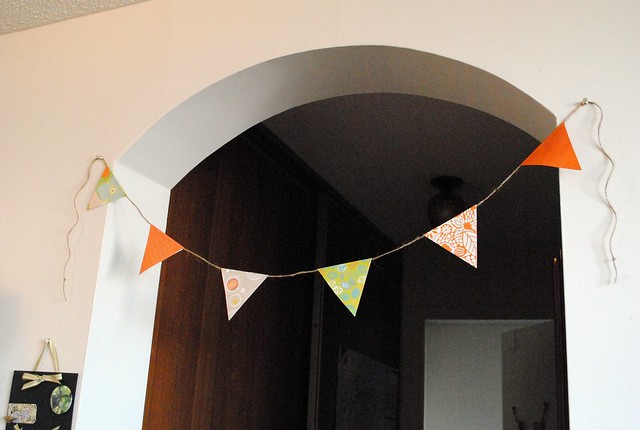
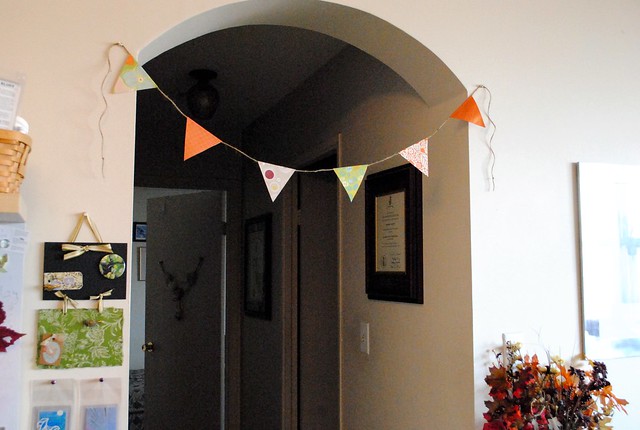
Hang it up and celebrate the season!
Variations: I think it's fairly obvious that you can make these in any size you want. Experiment with different string and papers. You could easily adapt this for any holiday or occasion. Click here to see a variation I made.
Tip: The paper flags may curl if the paper you use is too thin or lightweight. To prevent this, use a thicker cardstock or glue a thin piece of cardstock (from a cereal box for example) between the triangles.
If you end up making a quick paper banner, be sure to leave me a link in the comments!
This first one was very simple and came together in no time.
Materials:
coloured and/or patterned cardstock paper
twine, ribbon or some other string
scissors
glue stick
graph paper
pencil
ruler
Methods:
1. Choose your paper. I wanted to make a short banner, so I chose 6 different patterned / textured papers (I added a green one to this bunch).
2. Make a template. I used graph paper to make it easy. And it really is easy... just not so easy to explain. Let me try...
Using the ruler and pencil, I drew a diagonal that would make a triangle in the size I wanted for my flags (starting and ending at an intersection on the graph paper). Next, I made the triangle shape by counting the graph squares to the (soon-to-be) center of the (soon-to-be) diamond shape, then counting out that same number to determine the width of the diamond (this line completes the triangle now drawn). Once the second diagonal was drawn, I repeated the same steps along the vertical center line and filled in the final two diagonals. In other words, you should be able to connect the points of the diamond to create a cross that has arms of equal length and a top and bottom of equal length (typically a little bigger than the arms).
3. Cut out your template, then use it to trace a diamond on each of your papers. Cut them out (and erase any pencil marks if necessary).
4. Fold each diamond shape in half lengthwise to create your flags. Decide what side you want as the "front" and in what order you want them.
5. Cut out your twine. I estimated the length by placing my my flags on my desk, separated approximately by the distance I wanted them to be apart, and then just measured out the twine to accommodate this with extra for the ends. I then marked where I wanted to flags to go so that they would be centered (you could easily trim your twine at the end to skip this step).
6. Glue your triangles together (sandwich-style), capturing the twine along the fold.
7. Continue until all your flags are glued to the twine.
8. Trim the flag edges if necessary. I then finished the ends of the twine with a knot.
Hang it up and celebrate the season!
Variations: I think it's fairly obvious that you can make these in any size you want. Experiment with different string and papers. You could easily adapt this for any holiday or occasion. Click here to see a variation I made.
Tip: The paper flags may curl if the paper you use is too thin or lightweight. To prevent this, use a thicker cardstock or glue a thin piece of cardstock (from a cereal box for example) between the triangles.
If you end up making a quick paper banner, be sure to leave me a link in the comments!
No comments:
Post a Comment